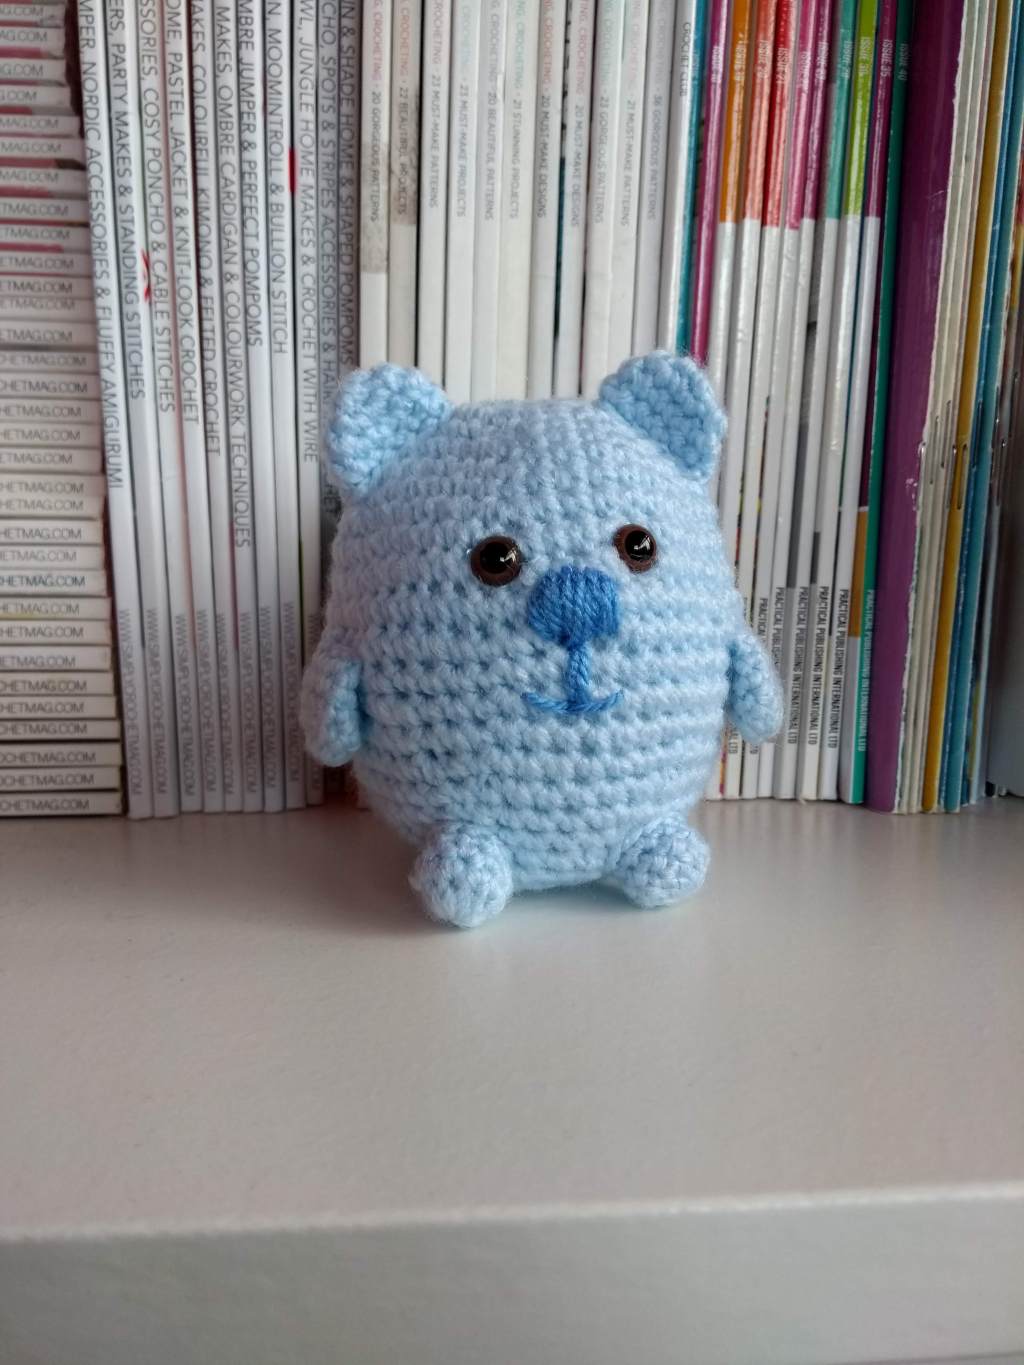
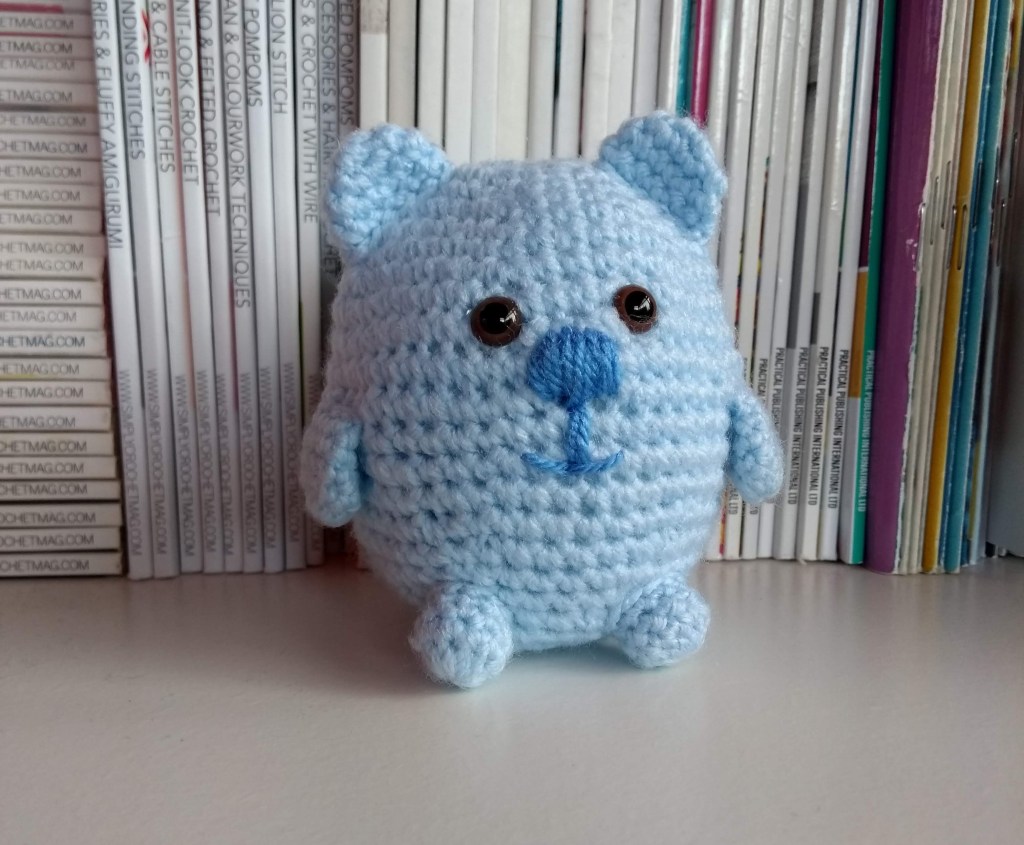
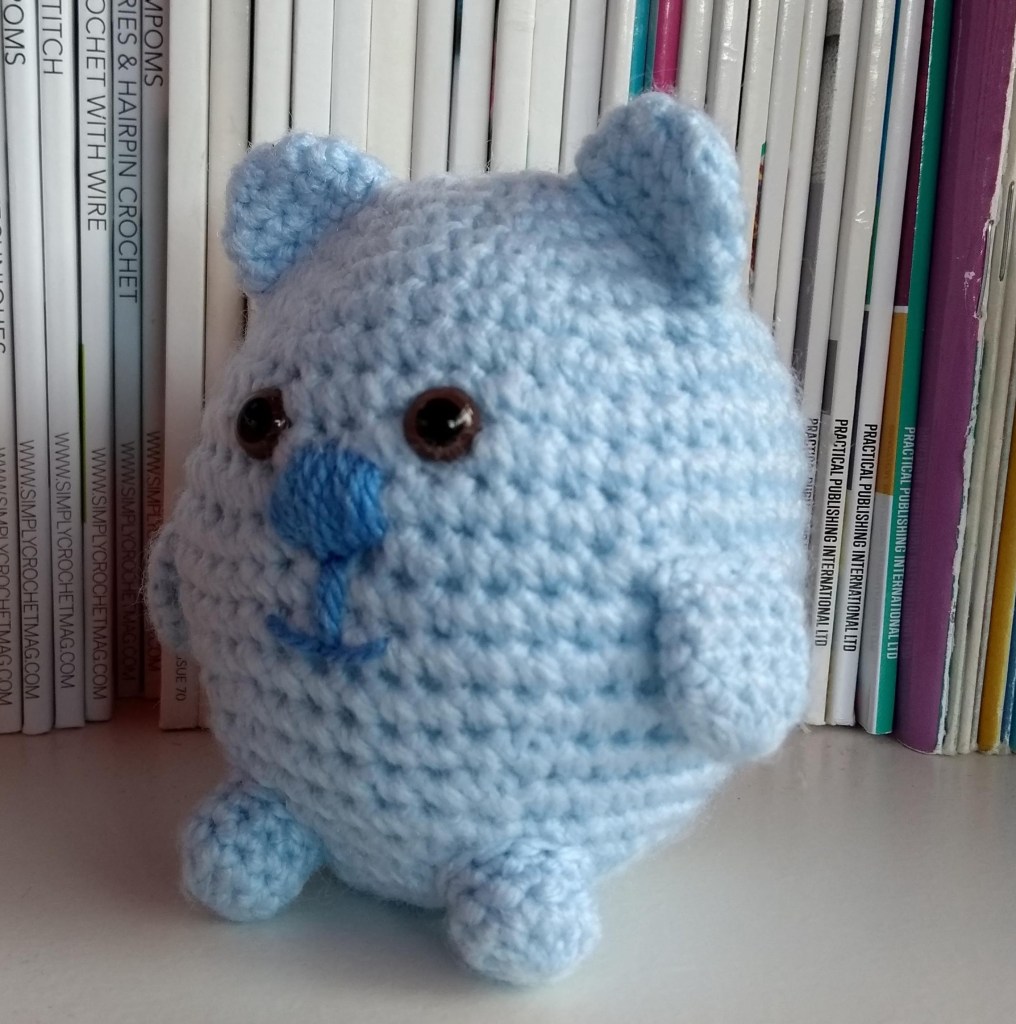
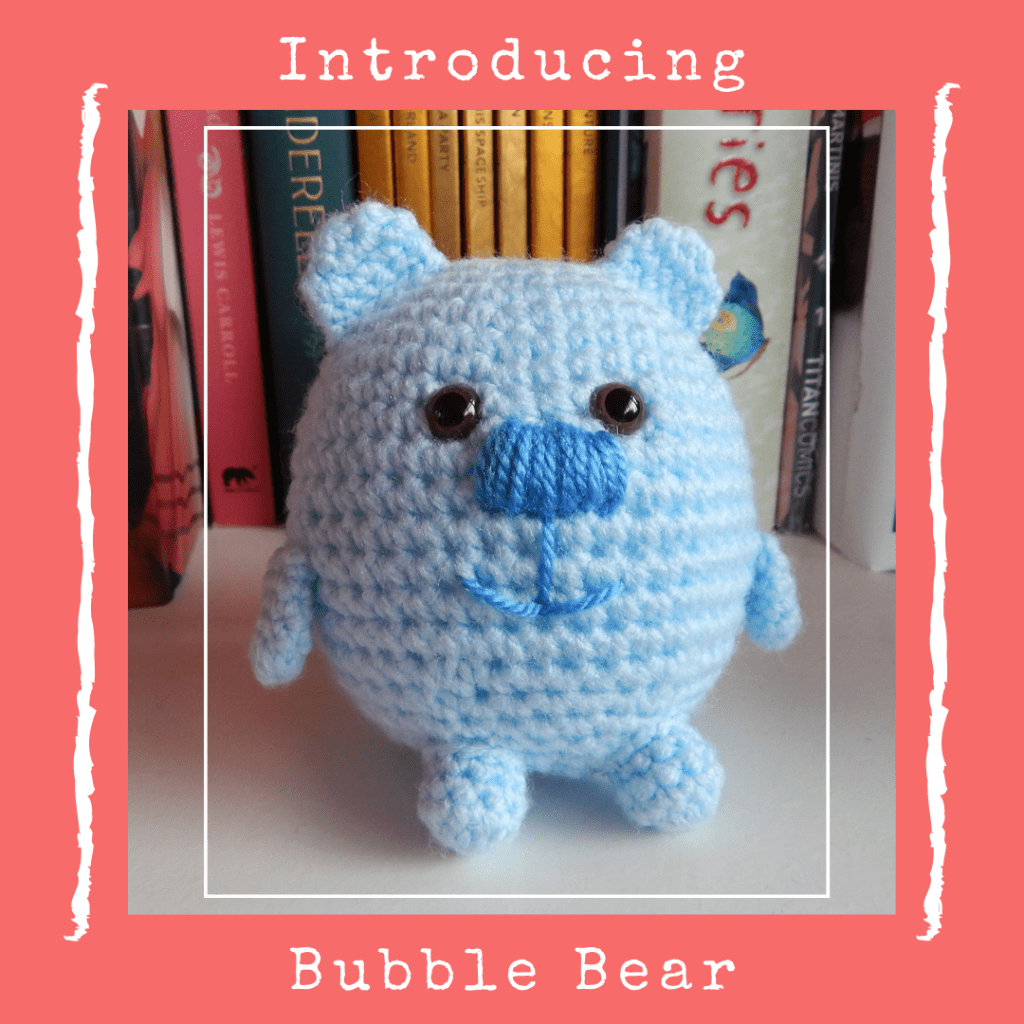
Meet Bubble Bear, he is a joyful bubble bouncing through life sharing joy with everyone he meets.
Recommended Yarn – James C Brett Super Soft Baby DK (100% Acrylic, 100g/290m)
- Blue
- A contrasting blue for the nose and mouth – small amount.
Tension: Tension is not critical for this project, but it may affect the yarn quantities required.
Equipment
- A 3mm hook
- Toy Stuffing
- Stitch Marker
- Sewing Needle
- Pins
- Scissors
- Safety Eyes: 10 mm (optional)
Abbreviations
- ch- chain
- dc – Double Crochet
- dc2tog – Double crochet two stitches together
- ss – slip stitch
Level: Easy
Measurements: Bubble Bear measures 8cm tall
Notes
- This pattern is written using UK crochet terminology.
- This pattern is worked using the amigurumi method. Work stitches continuously in a spiral without closing off each round with a slip stitch. You may find it easier to mark the first stitch of the round, moving the marker up as you work.
- Rounded brackets ( ) indicate the pattern and the number of times it is repeated. For example, (Dc in next sts, 2dc in next st) 6 times. This means double crochet one stitch, increase by double crocheting in the next stitch twice. This instruction should be repeated 6 times.
- Square brackets [ ] indicate the number of stitches you have after each round/row.
Decreasing rounds: You may prefer to use an invisible decrease, this technique will give your finished creation a neater appearance.
- To do this insert your hook into the front loop of the first stitch, then insert your hook into the front loop of the second stitch.
- Yarn over hook and pull through the first 2 loops on your hook.
- Yarn over hook and pull through the remaining 2 loops on your hook to complete the stitch.
If you would like a printable version of this pattern you can download it for free from – Lovecrafts
Body
Make a magic loop
Round 1 (RS) Ch1 (does not count as a st throughout) 8dc into loop. [8 sts]
Round 2 2dc in each st around. [16 sts]
Round 3 (Dc in next st, 2dc in next st) 8 times. [24 sts]
Round 4 Dc in each st around.
Round 5 (Dc in next 3 sts, 2dc in next st) 6 times. [30 sts]
Round 6 (Dc in next 4 sts, 2dc in next st) 6 times. [36 sts]
Round 7 Dc in each st around.
Round 8 (Dc in next 5 sts, 2dc in next st) 6 times. [42 sts]
Round 9 (Dc in next 6 sts, 2dc in next st) 6 times. [48 sts]
Round 10 – 16 Dc in each st around.
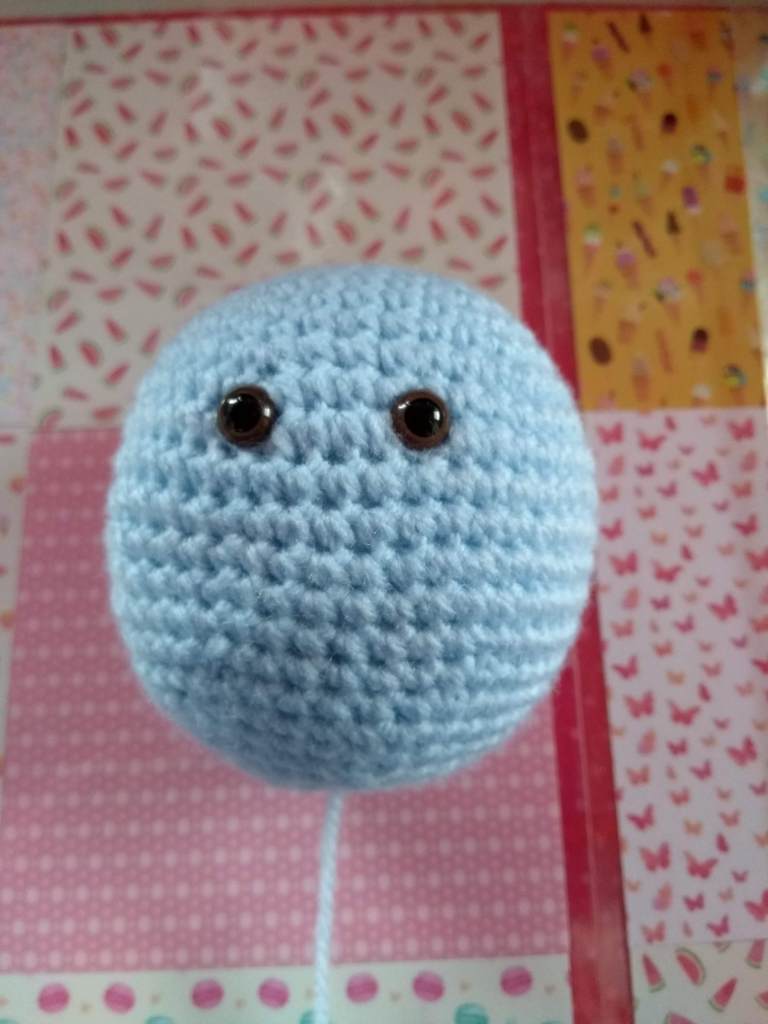
Place safety eyes between round 9/10.
Round 17 (Dc in next 6 sts, dc2tog) 6 times. [42 sts]
Round 18 (Dc in next 5 sts, dc2tog) 6 times. [36 sts]
Round 19 Dc in each st around
Round 20 (Dc in next 4 sts, dc2tog) 6 times. [30 sts]
Round 21 (Dc in next 3 sts, dc2tog) 6 times. [24 sts]
Round 22 Dc in each st around.
Round 23 (Dc in next st, dc2tog) 8 times. [16 sts]
Stuff the body.
Round 24 (Dc2tog) 8 times. [8 sts]
Fasten off and weave in ends.
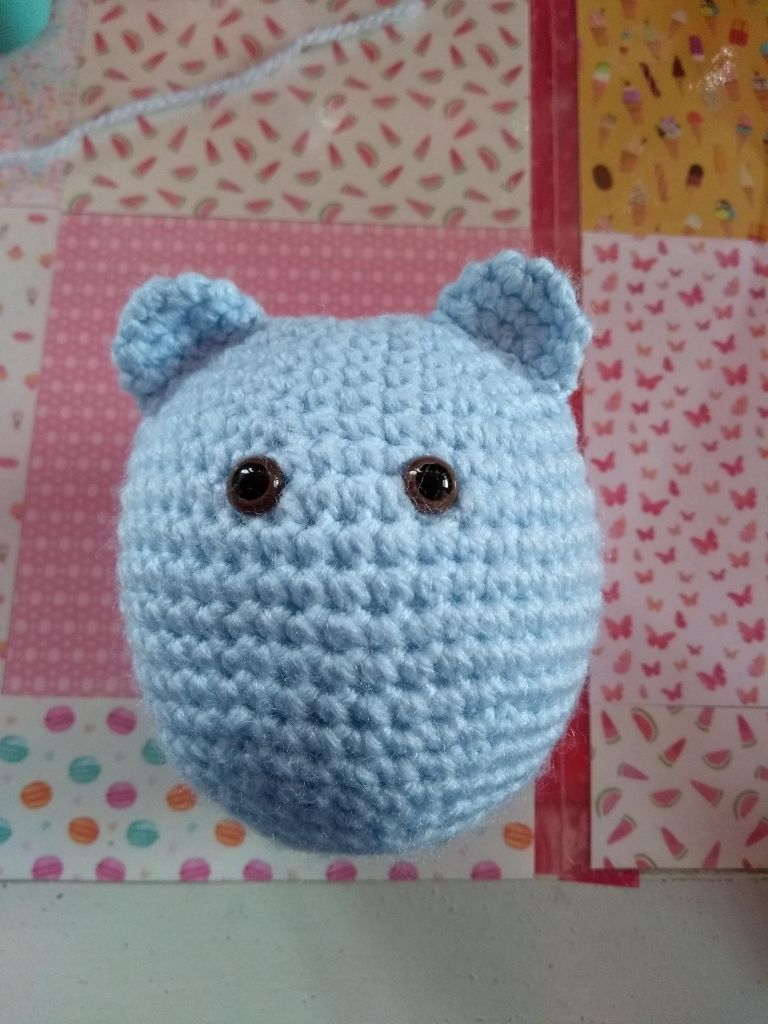
Ears
Make a magic loop
Round 1 (RS) Ch1 (does not count as a st throughout) 6dc into loop. [6 sts]
Round 2 2dc in each st around. [12 sts]
Round 3 – 4 Dc in each st around.
Fasten off leaving a long tail to stitch the ears to the body
Arms (Make 2)
Make a magic loop
Round 1 (RS) Ch1 (does not count as a st throughout) 10dc into loop. [10 sts
]Round 2 – 5 Dc in each st around.
Fasten off leaving a long tail to stitch the arms to the body.
Legs (make 2)
Make a magic loop
Round 1 (RS) Ch1 (does not count as a st throughout) 10dc into loop. [10 sts]
Round 2 – 4 Dc in each st around.
Fasten off leaving a long tail to stitch the legs to the body.
To Assemble Bubble Bear
- Pictures are provided as a guide to help you position the ears, arms and legs.
- The body is worked from top to bottom, rounds are counted from top to bottom when placing eyes and arms.
- Place safety eyes between round 9/10 of the body.
- Fold ears so they are flat, stitch the seam together and stitch to the body, use the photos as a guide for positioning the ears to the body.
- Do not stuff the arms, fold them so they are flat and stitch between Round 13/14 of the body.
- Stuff the legs before stitching, pin them in place and stitch around the outside of the leg, firmly securing them to the body of the bear.
I hope you have had great fun making your Bubble Bear. Try using different yarns and hook sizes to see what you can create. If you have any questions about this pattern feel please contact me.
